Web application penetration testing is an essential process for identifying vulnerabilities before malicious attackers can exploit them. Among the various tools available for such tests, Burp Suite stands out as one of the most popular and effective options for web application security assessments. This blog walks through the steps of using Burp Suite to conduct a thorough web application test, covering how to configure your scope, spider a site, discover hidden content, and run active scans to identify vulnerabilities.
Setting Up Your Scope
The first crucial step in any penetration test is defining the scope. Scope refers to the domains or fully qualified domain names (FQDNs) you want Burp Suite to focus on during testing. This helps ensure you don’t inadvertently scan domains that fall outside your testing agreement. You can add any URL or FQDN you want to test directly into the scope.
To add a domain to your scope:
- Navigate to the Target tab.
- Right-click on the domain or URL you want to add.
- Select Add to scope.
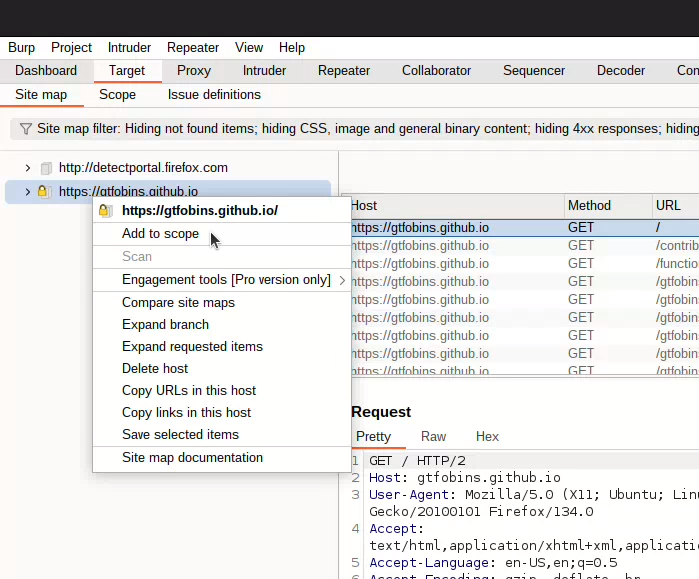
By doing this, Burp will know where to focus its spidering, testing, and vulnerability discovery efforts. It will also allow you to filter out domains that are not part of the testing scope, streamlining the testing process.
Spidering the Host
Spidering is a crucial step in web application testing. In Burp Suite, spidering means crawling through the entire web application to record all files, forms, and HTTP methods in use on the site. This gives you a comprehensive understanding of the site’s structure and allows you to identify important aspects, such as links, parameters, and external references, which are essential for later testing.
Burp will have mapped out the application’s structure. You can now click on any file within the Site map to see its corresponding request and response. The Site map provides a two-pane view: the left side shows files and folders, while the right side displays the requests and responses for each.
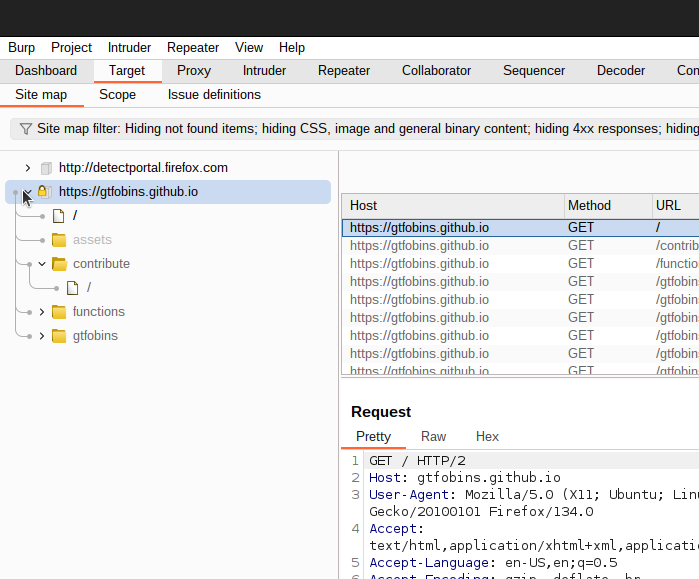
To filter out domains outside your scope, use the Filter button at the bottom of the Site map. This allows you to focus solely on the files and URLs within your scope, helping keep your test organized.
Discovering Hidden Content
Sometimes, not all pages or folders are directly linked within a web application. These hidden pages may include administrative folders or login pages that are purposefully obscured to avoid detection. Identifying these hidden areas is crucial for penetration testers, as they could be vulnerable to brute force or authentication bypass attacks.
Burp Suite has a powerful feature to help you discover such content: Discover Content. This tool can “smart brute-force” file and folder structures to uncover hidden areas.
To use it (only for pro users):
- Right-click on the parent URL within the Site map.
- Navigate to Engagement tools and select Discover content.
In the Discovery module, you can initiate the brute-force process, which intelligently attempts to find hidden directories and files by learning from the existing structure. This can help you uncover important resources, such as admin panels or configuration pages, that might be missed during the initial spidering phase.
If you’re using this feature in your tests, it’s recommended to use specialized or custom wordlists to improve the accuracy of the brute-force attempt. Tools like RAFT offer precompiled wordlists tailored to specific application types, such as WordPress, which could be a helpful resource.
Running the Active Scanner
Once you’ve mapped the application and discovered hidden content, the next step is to actively scan the application for vulnerabilities. The Active Scanner in Burp Suite allows you to fuzz input parameters, send various payloads, and automatically test for common vulnerabilities like XSS, SQL injection, and more.
To initiate an active scan:
- Right-click on the parent domain within the Target tab.
- Choose Actively scan this host.
Keep in mind that active scanning can be noisy and generate a lot of traffic, potentially affecting the performance of the web application or notifying the customer about excessive requests. It’s essential to communicate with your client about the scan’s timing and impact before running it.
Once the scan begins, Burp will analyze the application for common vulnerabilities and report its findings under the Scanner tab. You can also fine-tune the scanning process by adjusting the number of threads in the Options tab within the Scanner section. Increasing the thread count can speed up the process, but be cautious, as it could overwhelm smaller websites or cause them to crash.
Analyzing Scan Results
After running the active scan, Burp Suite will provide a detailed report of the vulnerabilities found. This may include issues such as Cross-Site Scripting (XSS), SQL injection, or insecure HTTP headers. For example, if Burp detects an XSS vulnerability, it will show the specific request and the payload that triggered the issue.
To verify whether a finding is a true vulnerability or a false positive, you can replicate the attack manually. For instance, if Burp identifies an XSS vulnerability, you can visit the URL in a browser and test whether the payload is executed as expected, confirming the issue’s validity.