
When performing penetration tests, especially in environments with strict security controls, having a quick and simple way to test network services is invaluable. While many tools and compilers are not always available, Python provides an excellent way to create basic TCP clients and servers on the fly. In this blog post, we will walk you through the process of creating a TCP client and server in Python, which will help you in a variety of scenarios such as service testing, fuzzing, or even crafting proxies.
Building a Simple TCP Client in Python
Why a TCP Client?
A TCP client is essential when you need to send data to a service over the network, often used during penetration testing to test the availability or behavior of a service, simulate client-side traffic, or even fuzz a service to identify vulnerabilities. This can all be achieved with just a few lines of Python code.
Here’s a simple Python TCP client that connects to a target server, sends a request, and prints the server’s response.
TCP Client Code
import socket

target_host = "0.0.0.0"
target_port = 9998

# Create a socket object
client = socket.socket(socket.AF_INET, socket.SOCK_STREAM) # Step 1

# Connect to the server
client.connect((target_host, target_port)) # Step 2

# Send some data
client.send(b"ABCDEF") # Step 3

# Receive some data
response = client.recv(4096) # Step 4

# Print the server's response
print(response.decode())

# Close the connection
client.close() # Step 5
Explanation
- Step 1: Create a socket object using
socket.AF_INET(IPv4) andsocket.SOCK_STREAM(TCP). - Step 2: Use the
connect()method to establish a connection to the server at the specifiedtarget_hostandtarget_port. - Step 3: Send data to the server.
- Step 4: Receive the response from the server and print it.
- Step 5: Finally, the client closes the socket connection after the response is received.
Common Assumptions
While the example above is simple, it makes a few assumptions:
- The connection will always succeed.
- The server expects to receive data first.
- The server will always respond in a timely manner.
In a production environment, it’s important to handle errors such as connection failures, timeouts, or unexpected server behaviors using exception handling and non-blocking sockets.
For a more robust solution, you could add retry logic, timeouts, or even asynchronous processing, but this code gives you a minimal working client that you can tweak and adapt for various penetration testing tasks.
You can find the full TCP Client code here: Insert Link
Creating a TCP Server in Python
Why a TCP Server?
Sometimes during penetration tests, you might need to create your own server to interact with clients, such as when you’re testing a custom protocol, building a command shell, or implementing a proxy. Python makes creating TCP servers easy, and today we’ll build a simple multithreaded TCP server that can handle multiple clients.
TCP Server Code
import socket
import threading

IP = '0.0.0.0'
PORT = 9998

def main():
    # Create a TCP socket
    server = socket.socket(socket.AF_INET, socket.SOCK_STREAM)

    # Bind the server to the specified IP and port
    server.bind((IP, PORT))  # Step 1

    # Start listening for incoming connections
    server.listen(5)  # Step 2
    print(f'[*] Listening on {IP}:{PORT}')

    # Accept and handle incoming connections in a loop
    while True:
        client, address = server.accept()  # Step 3
        print(f'[*] Accepted connection from {address[0]}:{address[1]}')

        # Start a new thread to handle the client
        client_handler = threading.Thread(target=handle_client, args=(client,))
        client_handler.start()  # Step 4

def handle_client(client_socket):  # Step 5
    with client_socket as sock:
        # Receive data from the client
        request = sock.recv(1024)
        print(f'[*] Received: {request.decode("utf-8")}')

        # Send a simple acknowledgment response back
        sock.send(b'ACK')

if __name__ == '__main__':
    main()
Explanation
- Step 1: The server binds to an IP address and port, allowing it to listen for incoming connections. We use
0.0.0.0to listen on all available interfaces. - Step 2: The
listen()method starts the server, allowing it to accept up to 5 connections at a time. - Step 3: The
accept()method waits for an incoming connection and returns a new socket object to interact with the client. - Step 4: Each client is handled in its own thread, ensuring the server can handle multiple clients simultaneously.
- Step 5: The
handle_client()function processes the incoming data (in this case, just prints it) and sends a simple acknowledgment back to the client.
Testing the TCP Server
To test the server, use the TCP client we built earlier. When the client sends data, the server will receive and print it, and the client will receive an acknowledgment message (ACK) in response.
Here’s a sample output from the server when it accepts a connection from a client:
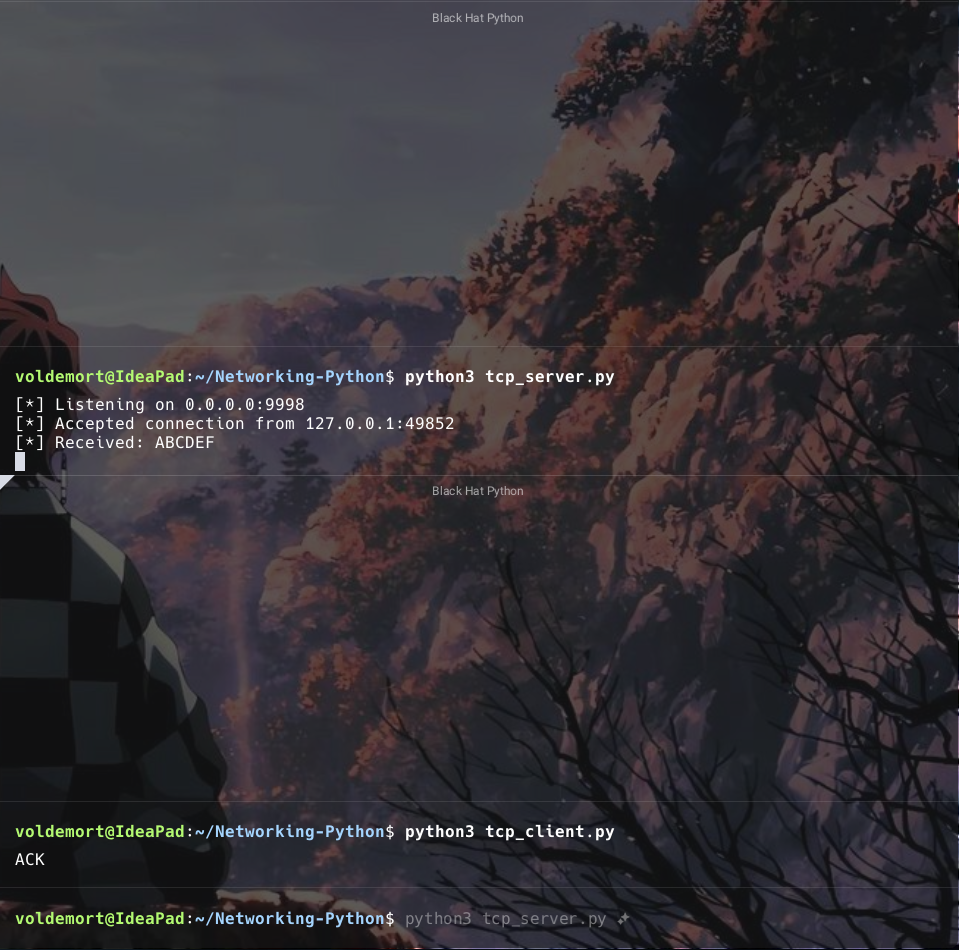
You can find the full TCP Server code here: Insert Link
By understanding these basic concepts, you’ll be better prepared to tackle complex networking challenges during penetration testing engagements. Happy coding!
If you found this article helpful, don’t forget to bookmark the links to the TCP client and server code and try building your own variations!